Chalkboard Doors!

We had these boring linen closet doors at the end of our dark boring hallway.

One night while I was being creative, I decided to turn the doors into charlkboards!

First I measured and taped the exact sizes I wanted.

Then I added 2 coats of chalkboard paint and allowed 3 days for drying.

Then it was finally chalk time!

This design allows for each of my 3 household members to have their own chalkboard section…


plus 1 large section for us to share our favorite inspirational qoutes.

I am very happy with the results.  We’ve had lots of fun leaving messages for each other.

Instagramming with Serenity

For those of you who do not know, Instagram is a fun photo-sharing app available in the apple app store and google play.  It offers fun filters for photo editing and crops everything into a visually appealing square.  My work at Erica Salmon Photography requires me to keep up with all the cool social media stuff, so Instagram obviously caught my eye.  Once this app became available for my Android smartphone, I couldn’t stop experimenting with it.

Now I instagram all the time.  I love trying different filters on my images and it’s so user friendly my 6 year old begs me to let her instagram also.  I also really enjoy reading the instagram blog and participating in their weekend weekend hashtag projects.

Maybe sometime soon, we will see an ESP instagram account, but until then here are some of my instagram photos from the past year.

If you find me super interesting you can follow me on intstagram @serenitybe

Harper’s New Bedroom

My daughter turned six 2 days after Christmas.  Instead of buying her a bunch of stuff she wouldn’t play with, I decided to remodel her bedroom.  She had been complaining that she was too old for her previous decor.  Apparently kindergartners are too sophisticated for puppy posters and pink bedspreads.  I asked her to pick out 3 paint colors and told her the rest would be a surprise.  She of course picked out 4 (because 4 is more than 3 and more is always better): lime green, purple, light blue, and teal.  I used Pinterest and my own creativity to come up with the rest.

Check it out…

This poster was super fun to create.  I used Adobe Photoshop to tint the images purple and add the words.  I then uploaded them Snapfish.com to create and print this collage print.

Here are a few shots of the finished room.

Instead of a dresser, I decided to use this $15 bookcase I found at Walmart and these $1 baskets from Dollar Tree. This is much easier for a 6 year old to organize and keep tidy.

The Headboard was revamped using white semi-gloss paint and lime green spray paint on the insert. The canopy was purchased at Justice.

These frames were purchased at Dollar Tree and painted to match.

Jewelry and Hair thing Holders-I purchased these from Goodwill for $2 each. I intend to paint the lids to match, but ran out of time before Christmas.

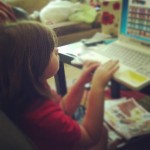
Harper's Office. The empty frames are for future Artwork created by Harper herself.

These are probably my favorite. I purchased round cookie sheets for $1 each and spray painted them to match. I then hot-glued coordinating ribbon to the backs for hanging. Viola! Magnet boards!

This was super easy. I purchased this bulletin board at Walmart and then added the rhinestone stickers to the top and bottom. I hot-glued ribbon to the back.

Another Walmart purchased that I spruced up. This time I used fancy duct tape to transform the frame. I again hot-glued ribbon to the back for hanging purposes.

This is a kitchen utensil holder that I found at Goodwill for cheap. I saw it and thought it would be perfect for holding dry erase markers and these magnets I made out of random household items (buttons, scrapbook buttons, clips, etc.).

The barbie house was a previous years Christmas present and conveniently it matches!

These frames were cheap, but I spiced them up with mats I made from scrapbook paper and fun stickers.

I can't take credit for this. We bought this adorable hat/scarf rack at an art fair.

One of my most helpful ideas...I put this cute basket in the bookcase and we just toss all of those flimsy paperbacks in. The basket allows us to flip through them without making a huge mess.

Just some fun little frames from Michaels

More bookcase frames

More of Harpers new bedroom can be found in some of my previous posts!

Thanks for reading!

Quote Frame

I was searching for inspiring artwork for my daughters bedroom online and stumbled upon a quote “Be awesome today”.  I decided to incorporate the quote into her bedroom remodel and this is how I did it.

I found a Goodwill picture frame and painted it to match my daughters room.

I used Letter sized scrapbook paper to print the quote with my computer and printer. I then cut the paper to fit inside the frame

After assembly!

The finished project in place on my daughters bedroom bookcase.

Headbands and Jewelry Holders

My daughters headbands were constantly being stepped on and broken, because they did not have a home.  I strolled through the aisles of my local Goodwill for household items I could use a a holder.  I came upon this: a CD/DVD holder.

CD/DVD Rack

First, I sanded the finish off of the rack, paying close attention to the words burned on each end.  I then covered it with Semi-Gloss paint.  After a thorough drying, I simply turned the rack upside down and added headbands.

Finished Project

Also, pictured above is a jewelry box I decorated, here is the play-by-play…

I purchased this box from Michaels and painted it with semi-gloss paint.

I attached Letter stickers and star decals to the box.

I then covered the entire box with a dark semi-gloss paint.

After drying, I carefully removed the stickers and decals.

Finished Project is pictured above.

Dry Erase Picture Frames

While stolling Pinterst.com I found a great idea for DIY Dry Erase Boards.

First, I found large wooden picture frames from Goodwill.  I looked for the 50% off color and snagged these at $1 each.

Goodwill Frames $1

Next, I painted the frames with Semi-Gloss paint and used Scrapbook paper to spruce up the frame insert.

Paint and Scrapbook Paper

After a thorough drying, I assembled the frames.

Assembled Frame

Next, I attached ribbon with hotglue and nails to the back of the frame.

Ribboned Frame

Finished Project

Look at me I’m blogging!

Hello!  I have been tasked with creating and maintaining the blog for Erica Salmon Photography.  Since I have no experience blogging and not very much experience reading blogs, I have to practice.

So, for the next few weeks I’m going to blog the crap out of my life.  I’m going to blog about running, arts & crafts, time management, fashion, remodeling my daughters room, etc.

This being my first post, I’m just trying to figure out the basics of this fancy wordpress business.

Thanks for reading.  I hope these posts become more interesting.